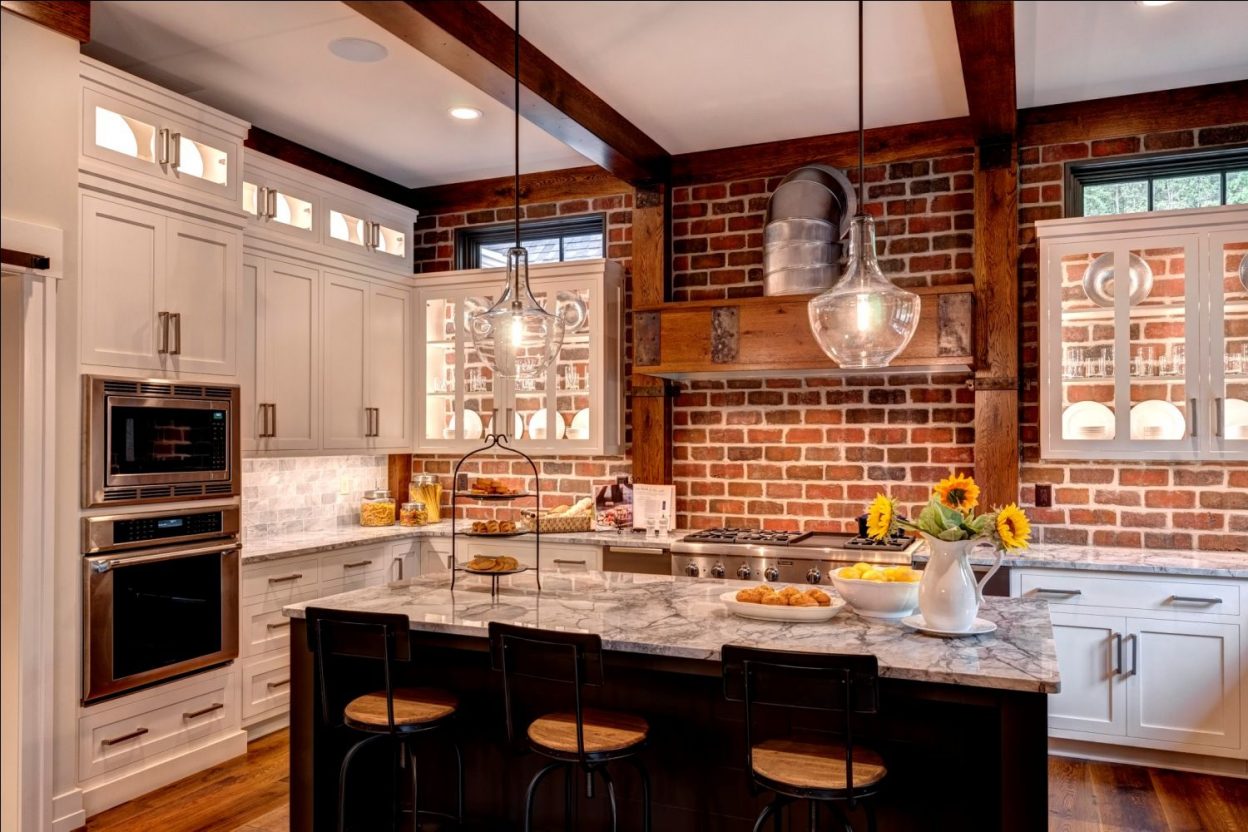
A brick backsplash in the kitchen is unique and eye-catching, and that’s the main thing. Kitchen backsplashes lean towards ceramic, glass or stone extensions or countertop material. On the other hand, a brick backsplash grabs your attention and lends an air of timeless permanence. It’s also a more manageable project to complete than it looks, thanks to a thin, easy-to-install brick veneer.
What is a brick backsplash?
A brick backsplash is a hard covering for the wall behind the kitchen counters. It has both decorative and functional uses.
As a decor, a brick backsplash creates a solid and classic look. Functionally, a brick backsplash provides a challenging, thick covering to protect the wall from damage.
A new brick backsplash is usually made from a brick veneer molded masonry unit, not extruded brick. In older homes, a brick backsplash kitchen made of solid may be original to the home, not an added feature.
Types of materials to use
Veneer brick
Advantages
- Fire retardant (can be used behind stoves)
- Impact resistant
- It looks like an actual brick
- Hard and solid
The inconvenients
- Must be sealed
- Difficult to clean
- Sensitive to chipping
- Requires mortar and grout
The best material for creating a brick backsplash is veneer or face brick, a manufactured stone.
Veneer brick is attractive, economical, thin and fireproof. It is intended only for decoration rather than construction.
It is available in various colors and styles: red, gray, multicolor, weathered, smooth and more.
Veneer brick looks like actual brick because it is a masonry product. Most of the veneer bricks available to DIYers are not real bricks. Instead, it is a veneer stone made in molds and hardened like concrete, not baked like a brick.
The veneer stone is made of Portland cement, aggregates and iron oxides. Since it is not a body-through unit, the coloring is on the surface. Thin bricks extruded through the body can be difficult for homeowners to find.
What is cross-body?
The body means that the color and material extend throughout the building unit. Bricks or tiles through the body wear well. Since the bullet points only reveal more of the same material below.
The veneer brick is light enough to be glued to the backsplash wall without needing bottom support. It is applied with adhesive mortar (the same material used for tiling) or with glue.
The grout applied to the joints between the bricks is purely decorative.
Faux Brick Veneer Panels
Advantages
- Lightweight
- Simple to install with glue
- Easy to clean
- Waterproof; no need to seal
The inconvenients
- More accessible to damage than brick veneer
- It may not look authentic
- Not flame retardant
- Only available in large panels
Veneer brick panels, sometimes called faux veneer or faux brick, can provide an alternative brick backsplash. It’s perfect for do-it-yourselfers who want to quickly install the backsplash without worrying about mortar or grout.
Made of polystyrene, these large format panels contain prints of several bricks (approximately 45 to 55) on a single board.
As a polymer, veneer brick panels offer the advantage of being waterproof, with no sealing necessary. They are so light that they attach to the wall with construction glue.
Veneer panels can be easily crushed or chipped upon impact. Also, although many types of veneer panels are rated to ASTM E84 Class-A fire standards, this does not mean the product is flame retardant. It only guarantees that the board has specific surface-burning characteristics.
What about using real bricks?
Full-size clay or concrete brick, used for building walls or creating pathways, is generally not an option for kitchen backsplashes.
Although full-size brick is inexpensive — the average cost is $1.80 to $3.60 per square foot of backsplash — it’s not practical for backsplashes because of its size and weight.
A full-size brick is approximately 4 inches by 8 inches by 2 inches thick. A full-size brick would eat up 4 inches of the limited depth of a 25-inch kitchen counter. Also, since the bricks would have to rest on the counter, their weight (about 5 pounds per square foot) would be too heavy for the counter.
Sustainability
As a hard surface, a brick veneer backsplash fares better than painted drywall. However, a molded veneer brick backsplash may be less durable than other hard surfaces, as chips or scratches strip the top color and reveal the gray cement-like body. Most manufacturers have touch-up paint for this purpose. Extruded thin bricks will not have this problem.
Size and Spacing
A brick backsplash can extend from the top of the kitchen counter to the ceiling. Or depending on location, it may stop at the bottom of the wall cabinets.
The brick veneer is sized to have the exact side dimensions as the actual brick: approximately 2 inches high by 8 inches long. This type of brick veneer comes in single brick-sized units.
Since wall cabinets tend to rise 18 to 24 inches above counter height, faux brick panels are perfectly sized for this space: typically 26 to 27 inches tall. An 8-foot stretch of countertop backsplash could then be covered with just two faux brick panels.
Brick veneer or panels increase the thickness of the wall by 1/4 to 3/4 inches, so electrical boxes need to be extended outward.
Brick Backsplash Cost
A brick backsplash will cost around $250 to $350 for 16 square feet. Brick veneer comprises most of this cost: about $150 to $200 for 18 to 20 square feet.
Another $100 to $150 will cover thin-set mortar, grout, and specialty tools you may still need to get on hand.
Faux brick veneer panels cost about 25 to 30 percent more than brick veneer. But the extra cost can be recouped as few other materials or tools must be purchased.
Maintenance and cleaning
One of the disadvantages of using bricks for a backsplash is that it is difficult to clean. Because brick is porous and can potentially absorb food spills, it must be coated.
The joints between the bricks also make cleaning the bricks a challenge. The joints must also be sealed.
Seal brick and mortar
Several coats of clear water-based sealer are applied to the entire surface of the brick backsplash. If the painted brick is your desired look, the paint itself will act as a sealer for the brick.
What you will need
Equipment / Tools
- Cordless drill with bits and screwdriver
- Manual screwdriver
- A wet tile saw, tile cutter, or hacksaw.
- Grout bag
- brick jointer
- Square tooth trowel
- Workshop vacuum cleaner
- Tape measure
- clean rags
- plastic sheeting
- To register
- Brush
Materials
- 18 square feet of brick veneer
- Adhesive mortar
- Jointing
- 80 grit sandpaper
- Electrical box extensions
- Concrete sealer
- Caulking and caulking gun
Instructions
How to Install a Brick Veneer Backsplash
- Measure the backsplash area: Measure the length of the counter and the desired height of the backsplash. Multiply the numbers, then add 10 percent to account for waste. An 8-foot countertop would require about 18 square feet of brick veneer for a 24-inch backsplash.
- Cover counters: Cover counters with plastic sheeting. Glue the plastic in place.
- Remove Facades: At the electrical service panel, turn off the circuit breaker to shut off the electricity to the wall area. With the cordless drill or manual screwdriver, remove the faceplates of switches and outlets.
- Prepare the Substrate: If the drywall is in good condition, it can be lightly sanded with 80-grit sandpaper to scratch it. This will help the mortar stick better. Clean the wall with the shop vacuum and a clean, dry cloth.
- Apply Thin Mortar: Use the flat side of the trowel to pick up and spread the thin-set mortar on the wall. Then go to the square notch side and paint the surface to leave thin lines about 1/8 inch high. Tip: Work in 2-by-2-foot sections to prevent the skim coat from drying prematurely.
- Press the brick veneer into place: Start at the counter and work upwards. Leave a 1/8-inch gap between the bottom of the brick and the counter to allow for movement. Press the brick into the wet thin-set, gently rocking it back and forth. Hold it until it sticks, then move on to the next one. Leave a joint of about 1/4-inch or as desired between the bricks.
- Cut Brick Veneer: When you reach an obstacle or exit, cut the brick. Use a wet tile saw to cut the brick. You can also cut the brick veneer on a tile cutter or hacksaw.
- Finishing brick at the top: When you reach the bottom of the wall cabinets or the ceiling, decide whether to cut the bricks lengthwise or leave a gap. Generally, if the gap is more than half the height of the brick, cut the filler bricks. If it’s less than half, you can leave some space, and it won’t be very noticeable.
- Add grout: Mix the grout and fill the grout bag. Unscrew the end. Press the grout into the joints—Smooth the grout with the grouting tool.
- Add Caulking: With the caulking gun, add caulking to the gap between the bottom of the brick and the counter.
- Joint surface: Once the grout has completely hardened, apply a transparent concrete sealer with a brush. Apply two to three coats until the brick surface is completely sealed. Tip: Sprinkle a few drops of water on the face of the brick veneer. If the water beads up, it is sufficiently sealed. If water seeps in, add more coats of sealant.
- Add extension cords and electrical box plates: Add extension cords to electrical boxes. Then reinstall the outlets and switches. Finish by reinstalling the faceplates.